Binding Bias and Bias Binding
- Jae Marie

- Mar 22, 2024
- 4 min read

Gentle readers, you’ll have to excuse me for my tardiness. I’ve had a bit of a trial. First I got sick, and then Freddie and Leona got sick. If you’ve ever nursed a sick dust bunny, you know just what I’ve gone through. They have many fine virtues, but they can also be drama queens. Excuse me for saying so, but they make terrible patients. Also, it doesn’t help that no pharmaceuticals have been tested on dust bunnies. One has to make do.
It hasn’t all been illness and misery though. We recovered enough to take a little trip together with our quilt guild to the coast, where we spent some time working on a miniature whole cloth quilt and tested one of our kits – the super simple scrappy Irish chain. I wanted to pretend I was someone who had just received the kit and was using it out of the package. I know I’m biased (we’ll address that below), but it was so simple and fun. I’m onto something good here!
Freddie and Leona were supposed to be helping me, but they mostly stayed busy getting into the snacks. Dust bunnies evolved to eat nameless detritus, which is quite low in easily digestible carbohydrates, so they have to be careful with some human foods. Leona in particular loves snacks, and you can see that Freddie was a bit worried about how this would affect her recovery. I snapped a pic right as she was about to make a dive for another helping of popcorn! Little scamp.

But don’t worry about them, they’re just fine. And so am I. I even finished my work.

However, of course, we’ve been delayed again on the Charmed Quilts front. But that’s okay, just call me Sisyphus. One day, the rock will stay up there.
Moving on…
This month, I thought we’d get religion.
Bias Binding and Binding Bias
I’m biased when it comes to binding. I have opinions on the subject. I’m a bias binding evangelist. In fact, I’m set up for all my kits to include bias binding strips, because it’s just rude to tell people you’ll do all the tedious cutting for them but then leave them to deal with binding on their own. Also, binding can noticeably impact the overall look and vibe of a quilt - so really, it should also be viewed as part of the design, and an element not to be neglected!
If you’re not a quilter (yet), let me just explain real quick that binding is a very narrow strip of fabric that finishes off the quilt on the edges. It protects the top and bottom fabrics and the fluffy stuff in between so that nothing gets frayed.

The top, bottom, and batting of the quilt together are called the “quilt sandwich,” and the binding looks kind of like a mouth that’s eating them. Here’s a little diagram I did so that you can see the hungry binding in action. Mmmm, textiles! There are many different ways to do binding, but as a binding evangelist, it’s up to me to explain why bias binding is superior!
1) Bias binding is more durable. Think about the way a piece of cloth is woven. The warp and weft threads run at 90° to each other all the way across and down the length of the fabric. If you cut and apply binding strips on the straight of grain, what happens is that as the binding strips are folded over to encase the raw edges of the quilt, and just a few threads will take all the wear and tear on the edges of the quilt. They will be apt to fray and break easily. Now, if you’re making a wall quilt or something where the edges won’t be rubbed, that’s fine. But if you want to make something that’s going to be more utilitarian, bias binding will spread the wear out over more threads, creating a longer lasting binding.
2) Bias binding conforms to odd shapes. Consider tumbling blocks, applecore, grandmother’s flower garden, or any pattern that doesn’t have a rectangular shape. After you put together the top and quilt your quilt, you have a zig-zaggy or curvy edge. One solution to this is to pull out a rotary cutter or a pair of scissors and cut the edges, so that the whole quilt has straight edges. Plenty of people choose to do this. However, I think it’s way more fun to leave the edges irregular, and sew the binding around the curves or angles. This makes for an unusual looking quilt and also, I dunno, I feel like I paid for that fabric, I pieced it, I quilted it, and darnit, it’s MINE! I don’t want to just throw it away. Thanks to bias binding, I don’t have to!
3) Stripes! Because it’s cut at a 45° angle, bias binding lets you create a barbershop-pole effect with any striped fabric. This lends a sense of motion and sprinkle of pizzazz. Obviously this is to be used with some discretion – you might not want to use this option on a traditional, softly colored quilt with a gentle feel. But it is so much fun in a brightly colored baby quilt, or a cheerful, casual modern quilt.
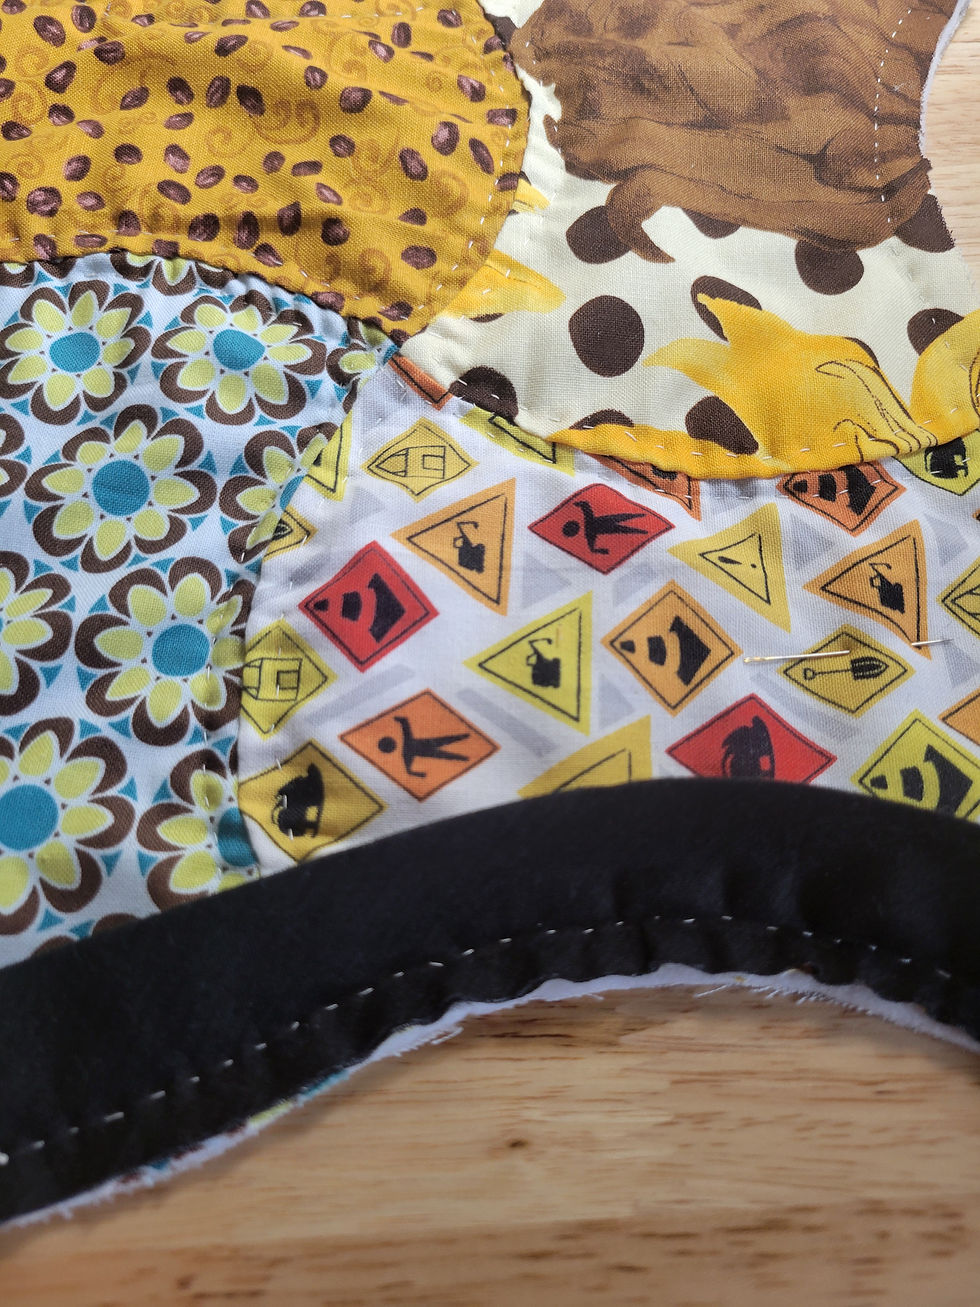
There are a few tips and tricks when using bias binding, but in my opinion, the hardest part is cutting it. If you have a rectangular quilt, you just miter your corners, which isn't hard to do, really. For quilts with acute angles, the trick is to make a tiny snip in the batting (1/8th inch or so, be careful not to cut your stitches!) at each acute angle, and then stretch the angle out to 180° while applying the binding to that angle. They'll fold right back up after you sew the binding, it's just like magic. Miter any angles 90° or larger. For quilts with gentle curves, or angles so small the bias tape can eat them up and turn them into gentle curves (like grandmother’s flower garden quilts with small hexies, maybe 1” or smaller), you don’t need to miter anything – the bias binding will just smoothly roll along, stretching beautifully as it goes and conforming to your quilt. Check out the 1930s/40s example below. Isn't that SOOTHING somehow? Aaaaaah! It makes me happy, and I bet it will make you happy too!


Good job Jilly. This is really good. I think you have a good way to write an entertaining blog. and... I finally learned what a bias is. Thanks